
Understanding Vapor Barrier Installation
What is Vapor Barrier Installation?
Vapor barrier installation is the process of placing a moisture-resistant layer in crawl spaces or basements to prevent moisture from seeping into the living areas of a home. These barriers are essential in creating a dry environment, protecting the structural integrity of a building, and maintaining indoor air quality. The materials used for vapor barriers are typically polyethylene plastic sheeting, which effectively blocks moisture from the ground beneath the home. Effective Vapor Barrier Installation mitigates issues such as mold growth, wood rot, and the overall degradation of your house’s foundation.
Importance of Vapor Barrier in Crawl Spaces
Crawl spaces are particularly vulnerable to moisture due to their proximity to soil and groundwater. Moisture can not only trigger a range of health issues—such as respiratory problems due to mold spores—but can also lead to significant structural damage. By installing a vapor barrier, homeowners can ensure that their crawl space remains dry, reducing the risk of water-related issues. Furthermore, a well-installed vapor barrier can improve energy efficiency, as it prevents humidity from affecting the HVAC system.
Key Materials Used for Vapor Barrier Installation
There are several materials commonly used in vapor barrier installation, each offering distinct benefits:
- Polyethylene Sheeting: This is the most common vapor barrier material, available in various thicknesses to suit different needs.
- Foil Barriers: These barriers reflect radiant heat, making them useful in areas where temperature fluctuations are common.
- Reflective Insulation: Combining insulation and vapor barrier properties, these materials are effective for energy efficiency.
- Specialty Vapor Barriers: Products designed for specific applications, such as high-moisture environments, offering enhanced protection.
Preparing for a Successful Installation
Assessing Your Crawl Space Environment
Before initiating the installation process, it’s critical to assess the crawl space environment. Look for signs of existing moisture problems, such as water pooling, mold presence, or musty odors. Proper ventilation must also be considered; if the crawl space is not adequately ventilated, it can lead to increased humidity levels, undermining the benefits of a vapor barrier. Additionally, inspect for gaps within the walls and floors that might allow moisture to seep in.
Choosing the Right Vapor Barrier Material
Choosing the right vapor barrier material necessitates understanding the specific conditions of your crawl space:
- Humidity Levels: Highly humid areas require thicker, more robust materials.
- Soil Type: Coarse soil may allow more moisture transfer, needing thicker barriers.
- Installation Location: Consider if the barrier will be laid on soil or a concrete surface.
Consult with local experts to identify the best material suited for your needs.
Tools Needed for Vapor Barrier Installation
Proper tools are crucial for an effective installation. Essential tools include:
- Utility knife or scissors for cutting material.
- Tape measure for precise sizing.
- Staple gun for securing the barrier to wooden beams.
- Long-handled roller for ensuring proper adhesion.
- Construction adhesive or tape for sealing seams.
Having these tools ready ensures a smooth installation process, reducing the risk of errors.
Step-by-Step Vapor Barrier Installation Guide
Preparing the Area for Installation
The first phase of installation involves cleaning and preparing the crawl space. Remove all debris, ensuring the area is clear of any blockages that could impede the installation. Inspect for any signs of existing moisture damage and repair issues, such as cracks in the foundation or walls. If there are excessively damp areas, consider using a sump pump or dehumidifier to manage moisture levels effectively.
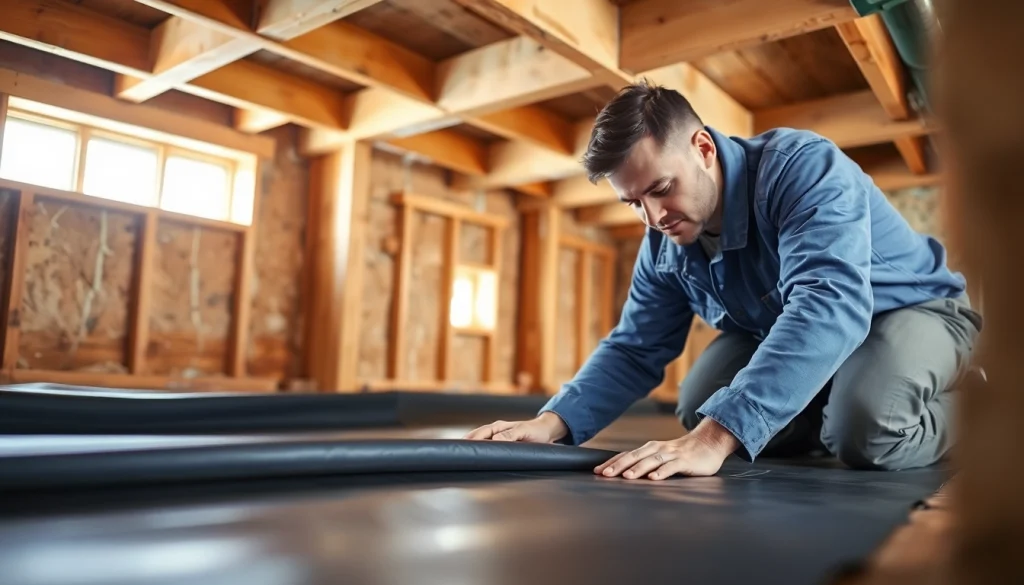
Installing the Vapor Barrier Correctly
After preparation, the next step is to install the vapor barrier. Follow these instructions:
- Roll out the polyethylene sheeting across the entire crawl space floor, overlapping seams by at least 12 inches.
- Secure the edges of the barrier to the walls of the crawl space using construction adhesive or double-sided tape.
- Use a staple gun to attach the barrier to any wooden beams that may be present.
- Cover any vents or openings in the wall with tape to ensure the area remains sealed.
Make sure there are no gaps, as even small openings can compromise the entire system’s effectiveness.
Sealing and Finishing Touches
After the barrier is in place, it’s essential to seal any seams or edges with waterproof tape to prevent moisture ingress. Consider installing a dehumidifier or ventilation system to further manage humidity levels within the crawl space, especially in humid climates. Finally, conduct a thorough inspection to ensure everything is secured before closing off the area.
Common Challenges During Vapor Barrier Installation
Dealing with Moisture Issues
Managing moisture can be one of the most significant challenges during installation. If high humidity levels are present at the time of installation, consider postponing until moisture levels decrease. Utilize a portable dehumidifier to improve conditions, thus optimizing the environment for installation.
Handling Irregular Crawl Space Dimensions
Crawl spaces come in various shapes and sizes, often presenting unique challenges. Measure all dimensions carefully and cut barrier sections accordingly to fit snugly into place. Custom solutions may be required for unusually shaped crawl spaces, ensuring complete coverage without significant gaps.
Avoiding Installation Mistakes
Common installation mistakes include improper sealing, miscalculating material needs, and insufficient overlap of seams. Always double-check your measurements and installation guide to avoid these pitfalls. It might also be beneficial to consult with professionals if uncertain about any step.
Maintaining Your Vapor Barrier After Installation
Regular Inspections for Damage
Post-installation, regular inspections are crucial to ensure the vapor barrier remains intact. Every six months, perform an inspection to check for tears, punctures, or signs of moisture. Promptly address any found issues to prevent escalation and maintain a dry environment within the crawl space.
Steps for Repairing Your Vapor Barrier
If damage occurs, repairs are straightforward. For small tears, simply clean the area and apply waterproof tape over the damage. For larger holes, cut a patch from a new piece of polyethylene sheeting and secure it over the damaged area with tape. Ensure all edges are well-sealed to mitigate future moisture issues.
When to Consider Professional Help
If you notice persistent moisture issues despite your installation efforts, it may be time to engage professionals. They can provide expertise in diagnosing underlying problems, such as inadequate drainage or structural issues, and offer viable solutions that may not be within a homeowner’s skill set.
Frequently Asked Questions
1. How long does a vapor barrier last?
With proper installation and regular maintenance, a vapor barrier can last 10 to 20 years, depending on the materials used and environmental factors.
2. Can I install a vapor barrier myself?
Yes, many homeowners can successfully install a vapor barrier themselves, provided they follow the correct procedures and use the right materials and tools.
3. What thickness should my vapor barrier be?
A thickness of 6 mil is commonly recommended for vapor barriers in crawl spaces; however, thicker options (10-20 mil) might be better for harsher environments.
4. Will a vapor barrier prevent flooding?
A vapor barrier is designed to reduce moisture exposure, but it is not a flood prevention system. Proper drainage and waterproofing are needed for flood protection.
5. How often should I inspect my vapor barrier?
It’s advisable to inspect your vapor barrier every six months, checking for signs of damage or moisture accumulation to ensure its effectiveness.